There’s an easy solution – a WordPress document library lets your visitors search, filter, and sort all of the documents that you want to make available. You can then give visitors a download button, or link them to a separate page where you’ve embedded the document.
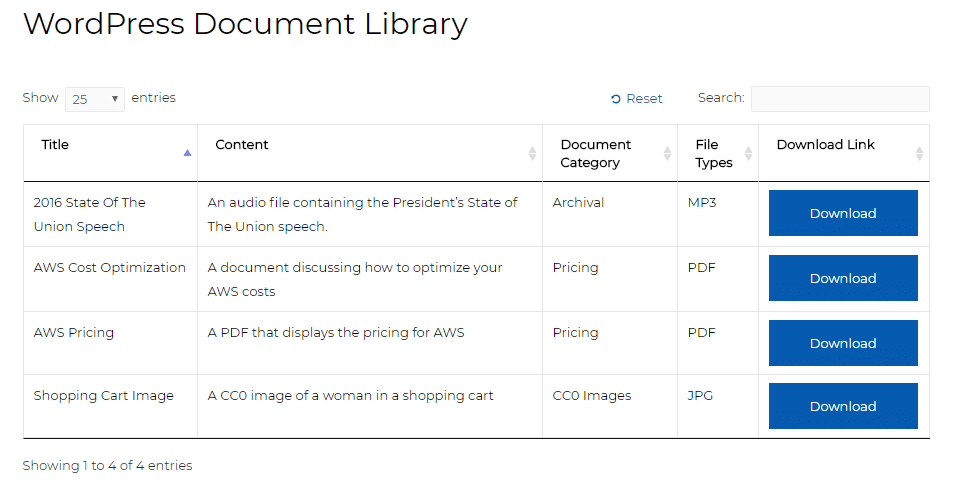
With the WordPress document library plugin that we’ll show you in this post, you’ll be able to create something a lot like this:
And it’s all flexible – so you can adjust functionality as needed to create a WordPress document library that’s unique to your needs.
Posts Table Pro helps you take WordPress posts, pages, or custom post types and display them in an easy-to-browse table format, complete with search, filters, and sorting. You can also control exactly which columns display in the table to add extra information – like a download link or a document reference number.
Hey…that sounds a lot like what a WordPress document library should do, right?
That’s why Posts Table Pro makes such a great option to create a WordPress document library. With it, you can:
Essentially, you have the ability to create a WordPress document library that matches your specific needs.
Here’s how it works…
To create a WordPress document library with Posts Table Pro, the basic process looks like this:
Let’s go through each step in detail…
To store your documents, we recommend creating a custom post type because it helps keep your documents separate from your regular WordPress posts and pages.
There are a lot of great plugins that make it easy to create a custom post type, but we’re especially fond of the free Pods plugin.
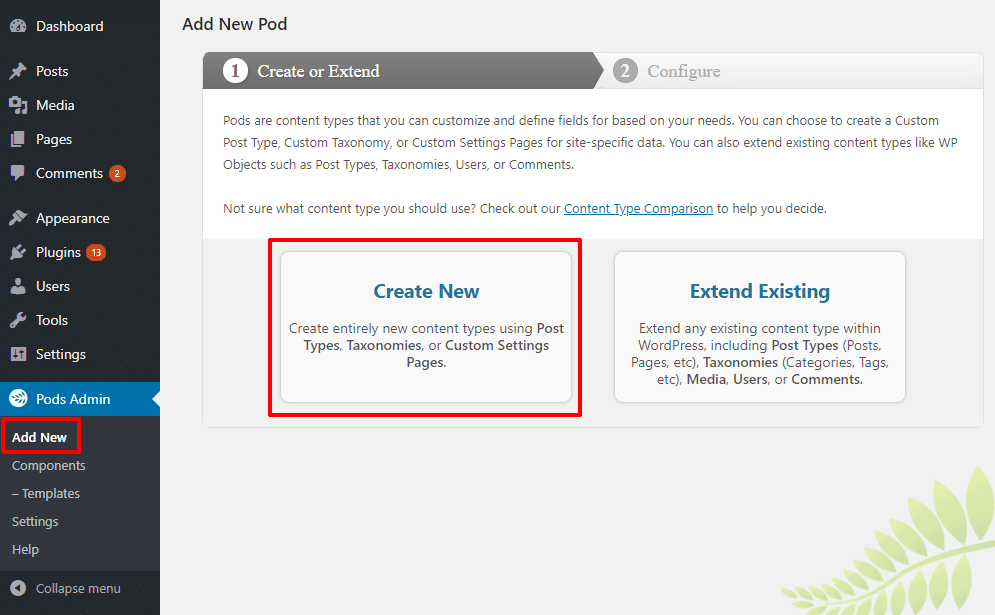
To use it, go to Pods Admin → Add New in your WordPress dashboard after you install and activate the plugin.
Then, select the option to Create New:
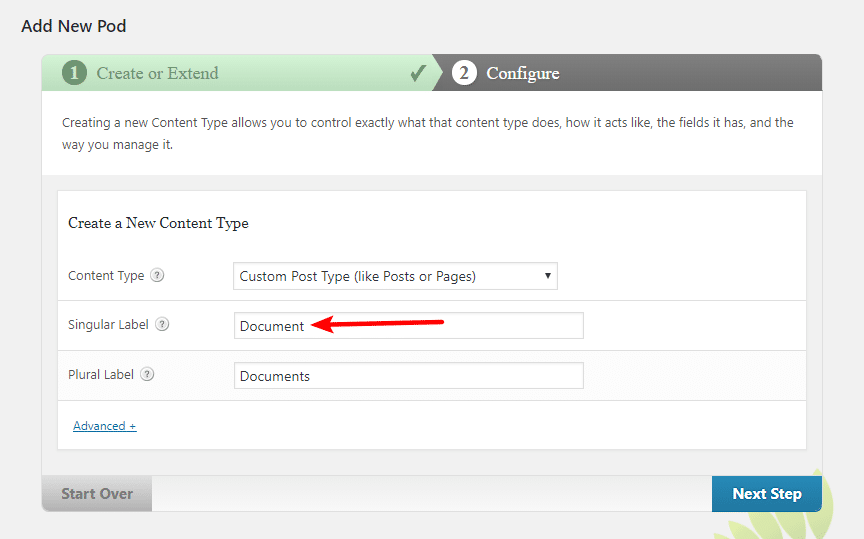
On the next page, name your custom post type Document (the actual name isn’t important – but using “document” will make it easier to follow the rest of the tutorial):
Custom fields and taxonomies help you store additional important information about your documents. The fields or taxonomies that you might need depend on exactly what you want to do with your document library.
At a minimum, you’ll probably want a custom field for a download link. But some other fields/taxonomies you might want include:
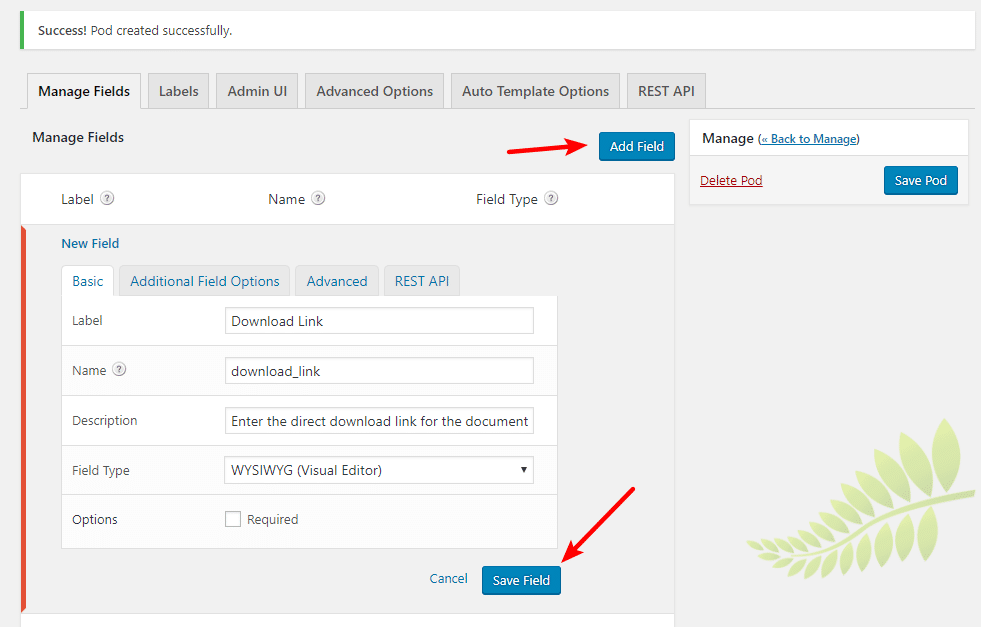
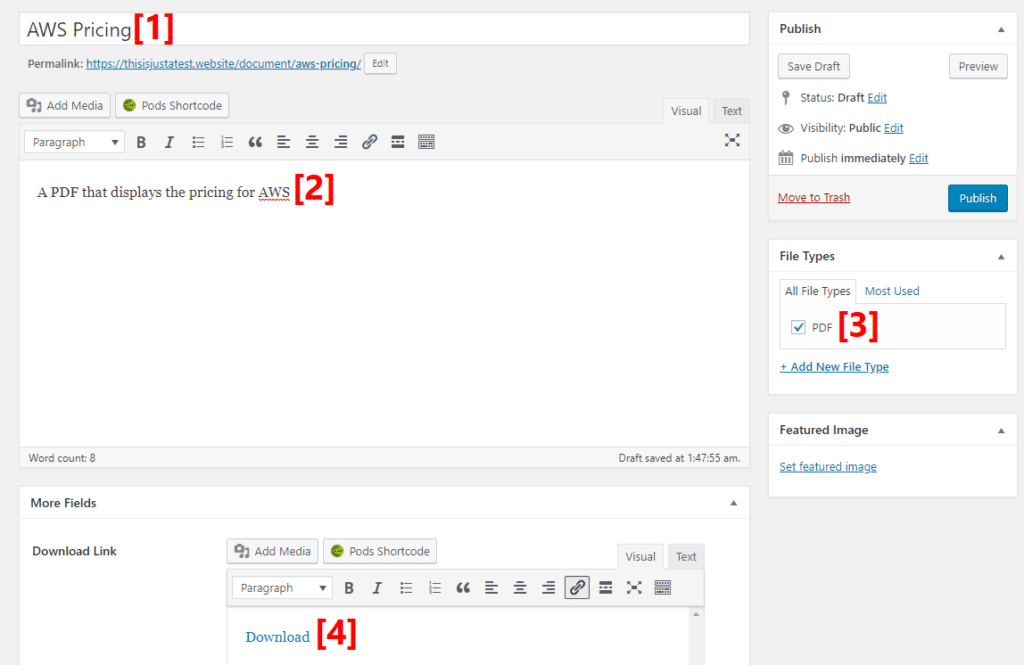
For example, to create a download button link, click on Add Field in the Edit Pod interface and select a WYSIWYG (Visual Editor) field. This will allow you to include a direct download link to each document:
You can also use the Page Links To plugin as an alternative to the custom field method for download links.
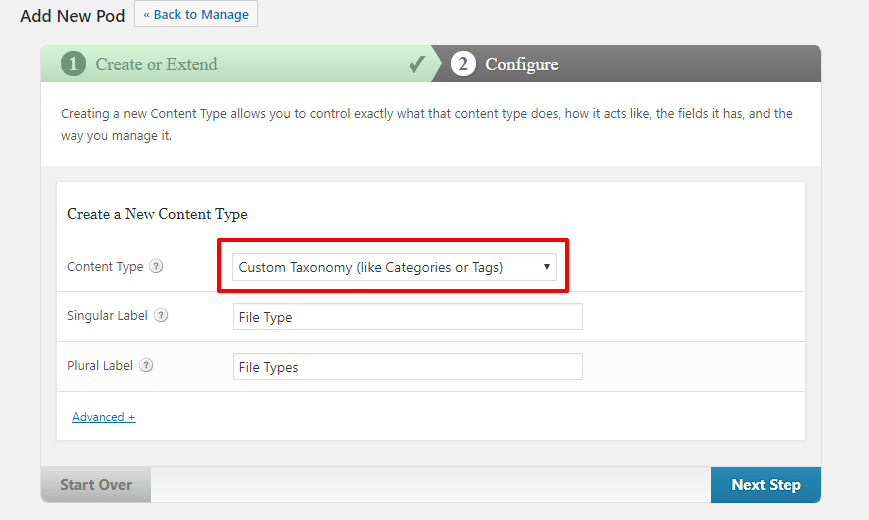
To create a custom taxonomy, you can go back to Pods Admin → Add New and click Create New again. Only this time, make sure to choose Custom Taxonomy from the drop-down:
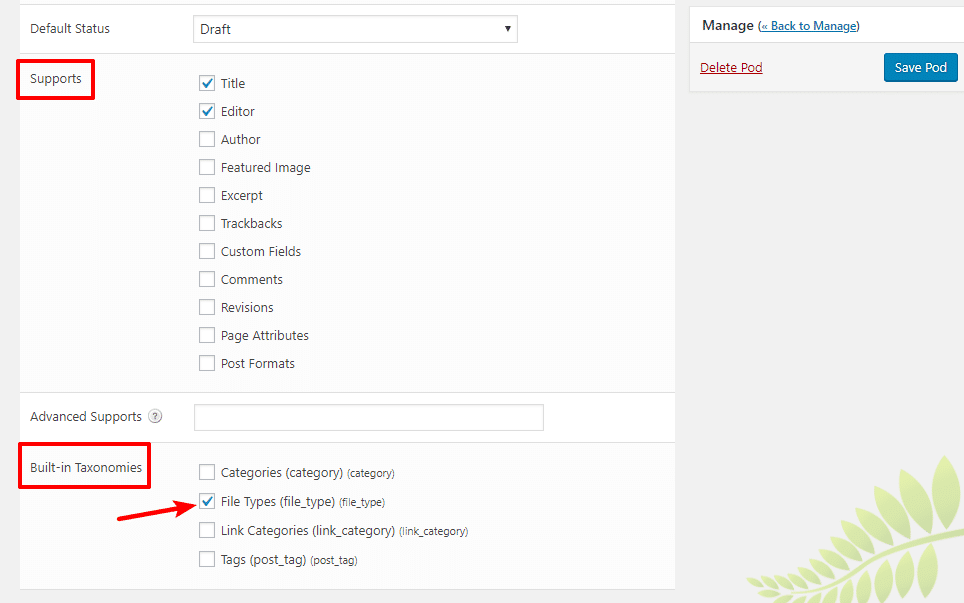
Then, you can associate your Download custom post type with that taxonomy by going to the Advanced Options tab in the Edit Pod interface for your Download custom post type. In this section, you can also add support for featured images or other details (for example, if you want to include a preview image along with each file):
Once you’ve created your document custom post type, along with any necessary custom fields and custom taxonomies, you’re ready to actually upload your documents to WordPress.
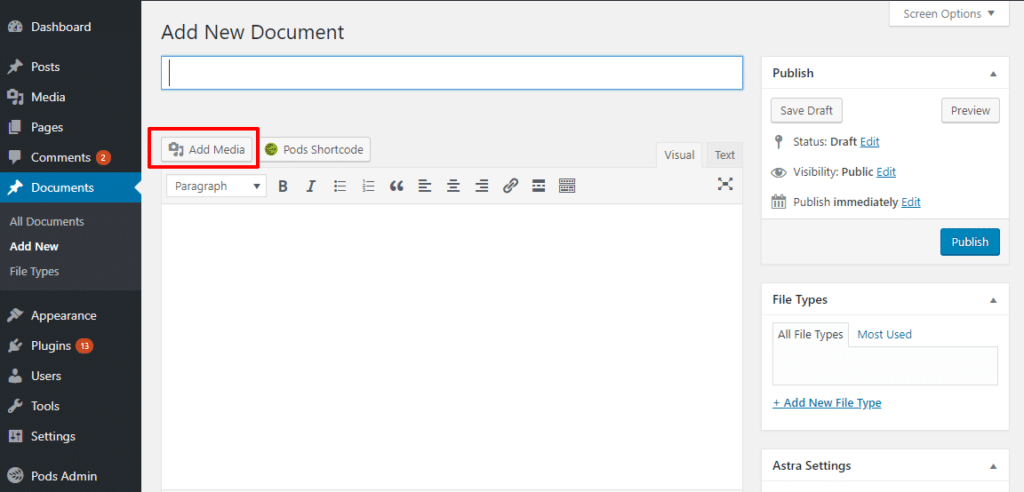
To do that, go to Documents → Add New in your WordPress dashboard.
The first thing you’ll want to do is use the normal Add Media button to upload your document to the WordPress Media Library (you can also bulk upload all your documents directly to your Media Library if preferred):
Repeat the process for all the files you want to include in your WordPress document library.
Once you’ve added your documents, all that’s left to do is display them on the front-end. That’s where Posts Table Pro comes in.
Using the Posts Table Pro shortcode, you can set up exactly how your WordPress document library looks and functions.
Posts Table Pro includes a ton of different shortcode parameters that you can use to configure how your document library looks and functions. With them, you’re able to control:
If you want to see the full list of options, you can check out this help article. But we’re going to skip straight to some pre-configured shortcodes that should get you quickly up and running with a great-looking document library.

This is the shortcode that we used for the example at the beginning of the post (and right above):
[posts_table columns=”title,content,tax:document_category,tax:file_type,cf:download_link” links=”none” post_type=”document” sort_by=”title”]
Essentially, this shortcode:
You’ll need to replace the custom taxonomies, fields, and post types with the actual names that you used (you can get these from the Pods interface), but otherwise, you can use the exact same shortcode for your document library.
And again – you can also use the full list of shortcode parameters to add or remove functionality that goes beyond our demo.
That wraps up our guide on how to use Posts Table Pro as a WordPress document library plugin.
But before we finish up this article, we want to cover a few different ways in which you can take your WordPress document library even further:
By using Posts Table Pro’s include/exclude functionality, you can create multiple different document libraries that only target specific documents (or categories of documents, etc.). For example, you can create a document library that only displays documents with a specific custom taxonomy, or only displays documents from a specific author.
If you want to make your document library private, you have several options:
Have any other questions about creating a WordPress document library? Leave a comment and we’ll try to help out!